Step by Step Guide for Data Protection with Baffle and IBM Cloud Hyper Protect DBaaS for PostgreSQL
 March 22, 2022

Introduction:
IBM Cloud and Baffle Data Protection Services (DPS) for IBM Cloud enable provisioning of Baffle Manager and Baffle Shield and configure database encryption/decryption rules against the IBM Cloud Databases such as Hyper Protect DBaaS for PostgreSQL to encrypt and decrypt the database records/columns on the fly. It can also, migrate existing database records, and apply record/column-level encryption rules. In addition, IBM Cloud Baffle Services helps in decoupling encryption/decryption/masking of database records from the Database engine, thus providing an additional layer of security on an already protected and fully encrypted database such as IBM Cloud Hyper Protect (HP) DBaaS for PostgreSQL.
Reference Architecture:
The below reference architecture shows how the Baffle Shield can be deployed to encrypt the data in real-time from a web application as well as migrate the data from an on-premises DB2 to HP Database Server (DBaaS) on the IBM Cloud.
The below instructions list the steps to provision IBM Cloud Baffle Data Protection Service against the IBM Cloud Hyper Protect DBaaS for PostgreSQL.
Limitations:
Currently, only a Local Key Store provisioned by the Baffle Manager can be used for encryption, but being able to use the IBM Cloud Key Store feature for encryption is being added by the vendor and will be available soon.
Even though Baffle Manager and Baffle Shield can be run on both Kubernetes and RedHat Open Shift, Baffle Manager and Shield are currently only certified for Kubernetes.
Prerequisites:
- Provision a VPC in any region with three subnets with a public gateway attached to the subnets.
- Provision an IAM Public Key for your account.
- Provision a Kubernetes Cluster in a VPC network with both public and private endpoints enabled in the region of your choice using IBM Cloud Kubernetes Service with a minimum of 4 CPU / 16 GB with two nodes and auto-scaling enabled.
- Provision IBM Hyper Protect DBaaS for PostgreSQL.
- Baffle Shield and Baffle Manager images are available in the IBM Cloud Container Registry.
- Install IBM Cloud with CR and VPC plugin for Terminal access to the resources in IBM Cloud.
- Install Kubectl for terminal access to the Kubernetes Cluster.
- Install PGAdmin (for PostgreSQL) or DBeaver Database client tool for connecting and querying Databases.
Step by Step:
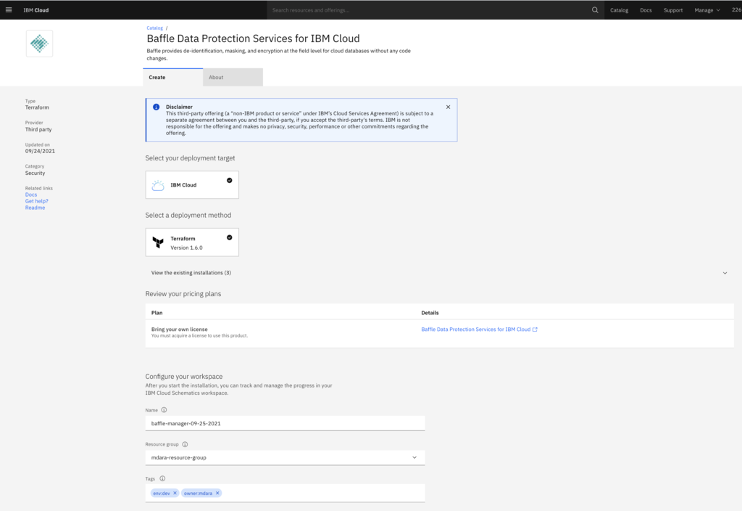
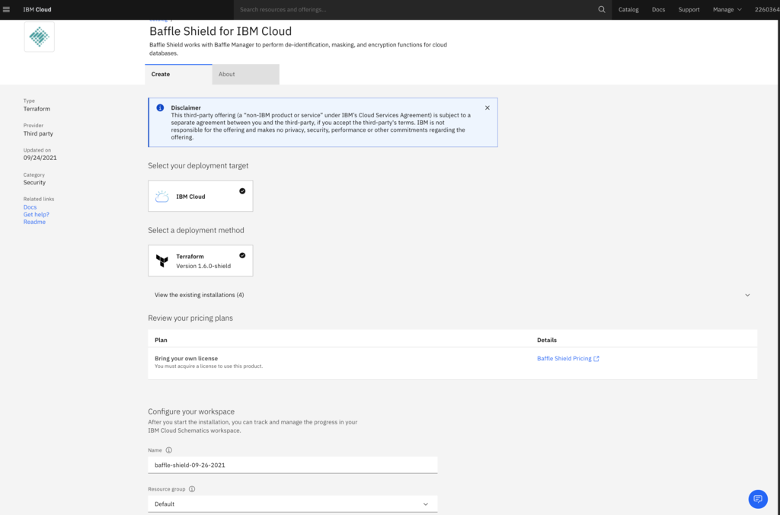
1) Create Baffle Manager using IBM Cloud Data Protection Service
Create Baffle Manager as shown on the screen shot below.

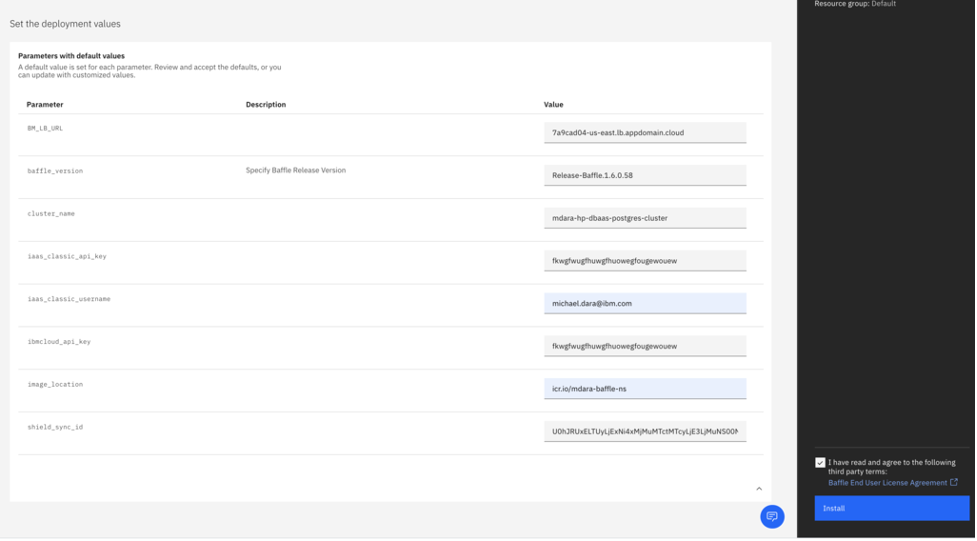
Populate the Deployment Parameters
| iaas_classic_api_key | Use IBM API Key |
| iaas_classic_username | User your IBM Cloud login email |
| ibmcloud_api_key | Use IBM API Key |
| image_location | IBM CR location where Baffle images are present |
| cluster_name | Kubernetes Cluster Name |
| flavor | Leave it as default |
| region | specify the region of the Kubernetes cluster |
| resource_group | Your resource group name |
| vpc_name | Your VPC name where you are deploying Baffle |
| worker_count | No of Baffle Worker Nodes |
| baffle_version | Specify Baffle Release Version |
Check the End user Agreement check-box then click Install.
Baffle Manager application will be deployed on the Kubernetes Cluster as shown below.
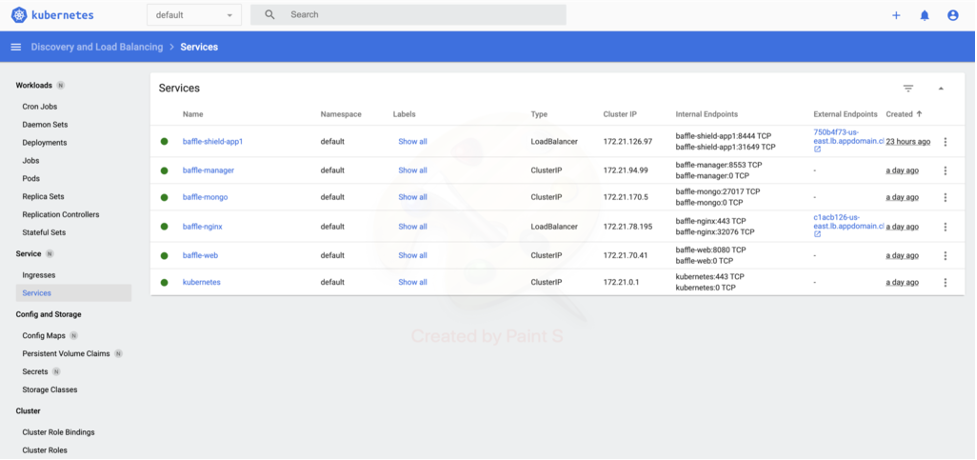
Use the Baffle-Nginx Load Balancer URL from the above screenshot (https://c1acb126-us-east.lb.appdomain.cloud/) in Chrome (if you have the security plugin) or Firefox. Follow the configuration prompts.
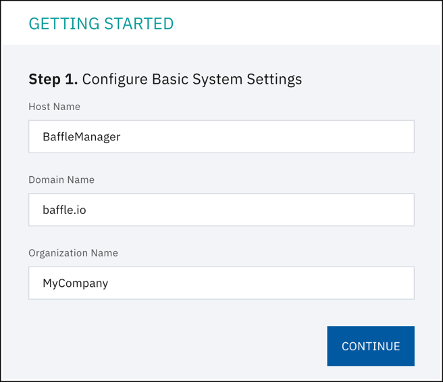
Step 1. Configure System Settings. Enter a Host Name, Domain Name, and Organization Name. All system users must have this domain name as part of this email going forward. Then click CONTINUE.
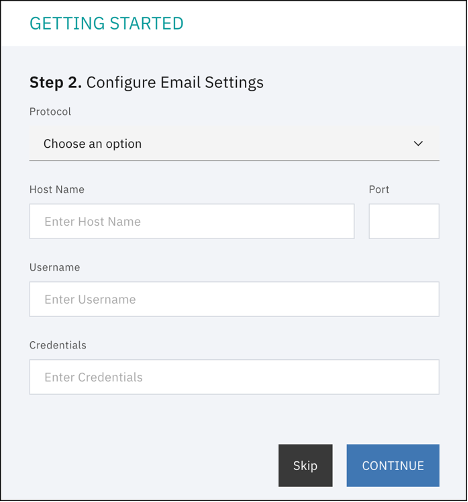
Step 2. Configure Email Settings, click Skip, unless you want to setup an SMTP server, then click CONTINUE.
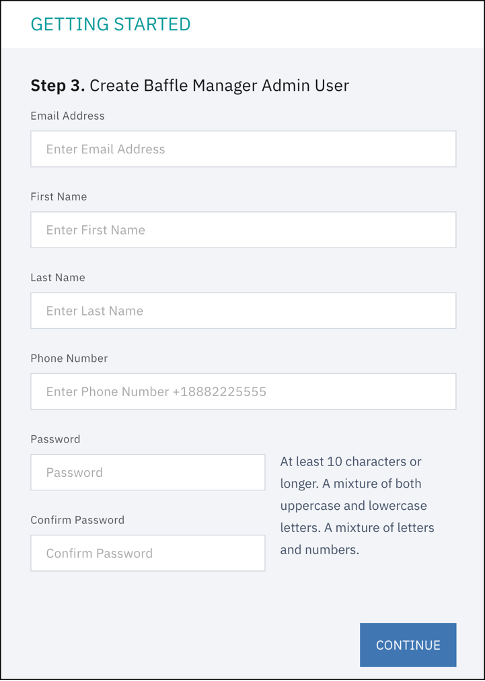
Step 3. Create Admin Account. This account is used to configure the subsequent components such as the key management store, data store connections, and Baffle Shields.
Make a note of the email address and password as you fill in the fields, then click CONTINUE.
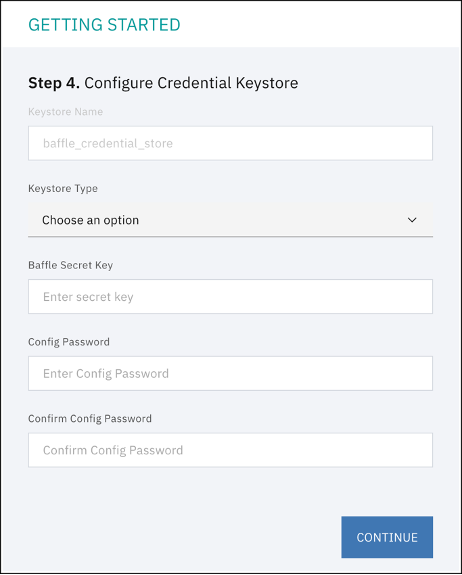
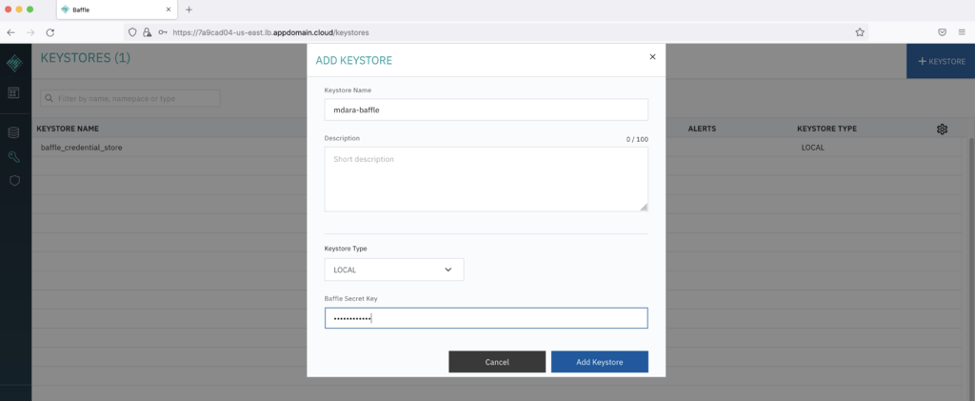
Step 4. Configure Credential Keystore establishes an encrypted credential store for any system access credential or access key that the Baffle Manager or Baffle Shield utilize. The default name is “baffle_credential_store” and cannot be changed.
Select LOCAL for the Keystore type. Enter the Baffle Secret Key in the text field. NOTE: The Baffle Secret Key must contain at least 10 characters, a mixture of upper and lower case, including at least 1 number. You can enter anything for the Secret Key and password, then click CONTINUE.
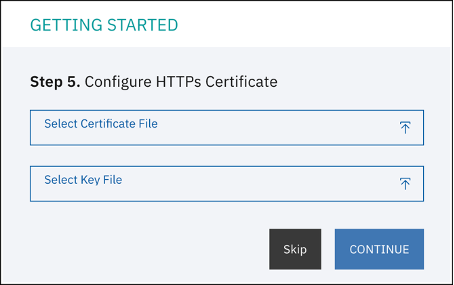
Step 5. Install SSL Certificate. This step allows you to install an SSL certificate to secure access to the Baffle Manager web interface
You can click Skip.
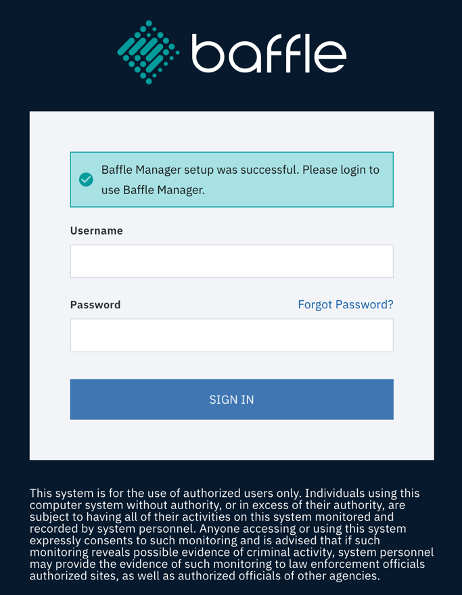
The Baffle Manager login screen appears and is ready for use. Enter the Baffle admin user and password created in the previous steps to sign-in.
Once signed in, add a new Local key store. NOTE: See Baffle documentation to Configure IBM Key Protect and add as a keystore.
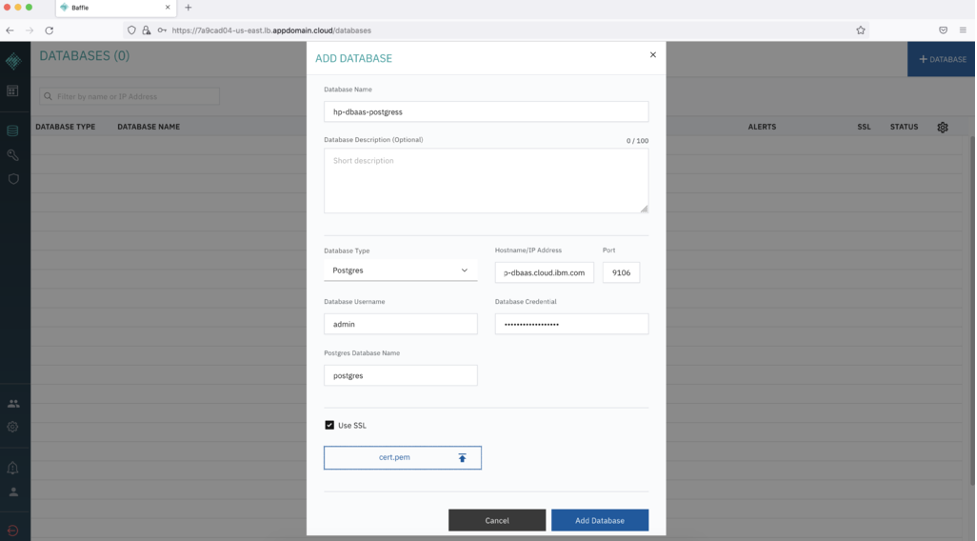
Add the HP DBaaS PostgreSQL you’ve created as a prerequisite (and download a cert.pem from the database)
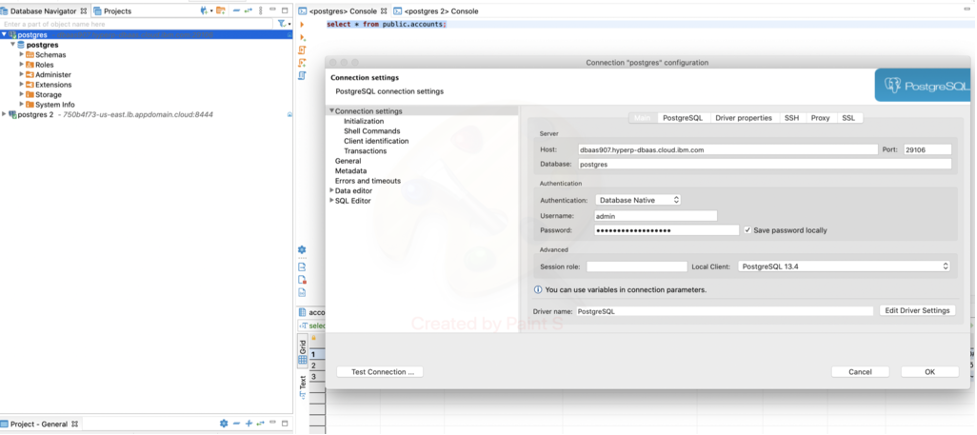
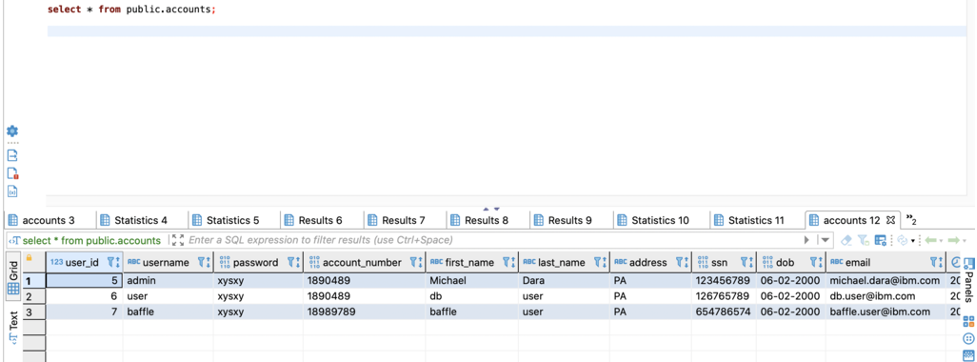
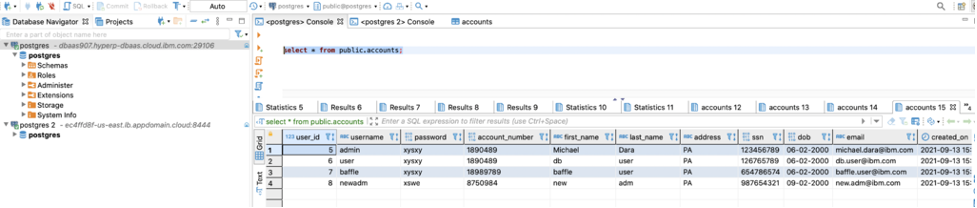
Connect to Hyper Protect DBaaS with DBeaver, Create table and create test data.
Use the below queries to create a sample table:
CREATE TABLE public.accounts (

        user_id serial PRIMARY KEY,

        username VARCHAR ( 50 ) UNIQUE NOT NULL,

        password VARCHAR ( 50 ) NOT NULL,

        Account_number VARCHAR ( 50 ) NOT NULL,

        first_name VARCHAR ( 50 ) NOT NULL,

        last_name VARCHAR ( 50 ) NOT NULL,

        address VARCHAR ( 50 ) ,

        ssn NUMERIC ( 9 ) NOT NULL,

        dob VARCHAR ( 10 ) NOT NULL,

        email VARCHAR ( 255 ) UNIQUE NOT NULL,

        created_on TIMESTAMP NOT NULL,

        last_login TIMESTAMP

);
Insert sample data to the accounts table.
INSERT INTO public.accounts

(username , password , Account_number, first_name , last_name, address , ssn , dob ,email , created_on , last_login)

VALUES

( ‘user’ ,  'xysxy' , '1890489' ,  'Michael' ,  'Dara' ,  'PA' ,  '123456789',  '06-02-2000', 'michael.dara@ibm.com',  TIMESTAMP '2021-09-13 15:36:38', TIMESTAMP '2021-09-13 15:36:38');

INSERT INTO public.accounts

(username , password , Account_number, first_name , last_name, address , ssn , dob ,email , created_on , last_login)

VALUES

( 'admin' ,  ‘iufhg’ , '6574647' ,  ‘admin’ ,  ‘user’ ,  'PA' ,  '746393648',  '07-02-2000', ‘admin.user@ibm.com',  TIMESTAMP '2021-09-13 15:36:38', TIMESTAMP '2021-09-13 15:36:38');

INSERT INTO public.accounts

(username , password , Account_number, first_name , last_name, address , ssn , dob ,email , created_on , last_login)

VALUES

( ‘ba’ffle ,  ‘hdfg’ , '647649' ,  ‘ba’ffle ,  ‘user’ ,  'PA' ,  '765498764',  '08-02-2000', ‘baffle.user@ibm.com',  TIMESTAMP '2021-09-13 15:36:38', TIMESTAMP '2021-09-13 15:36:38');
Go back to the Baffle Manager Console and create/enroll a new application.
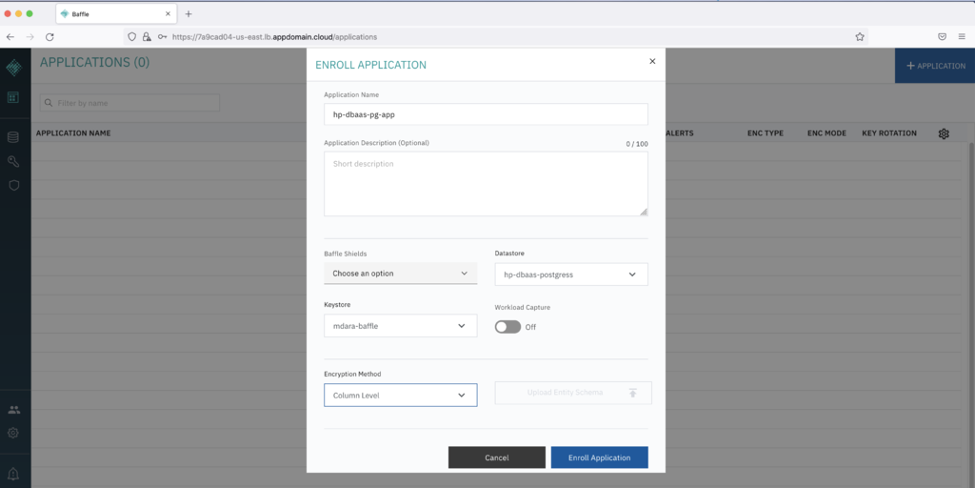
Click Enroll Application.
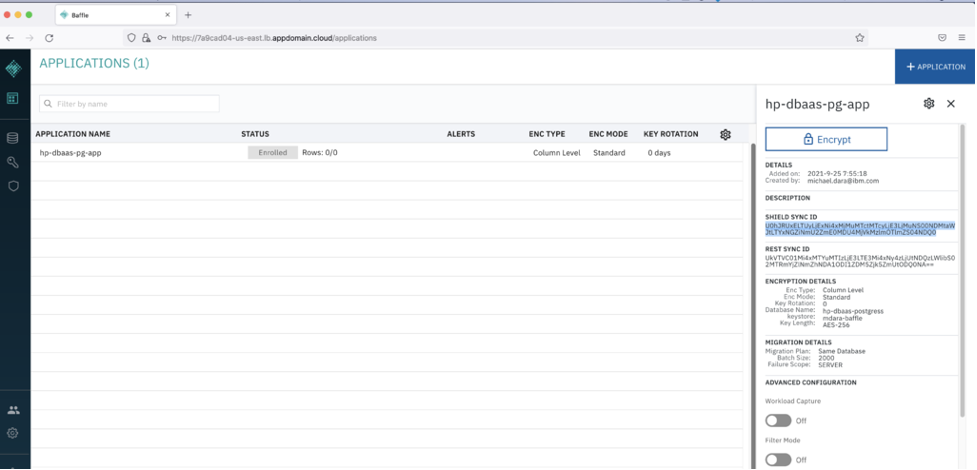
Note down the Shield Sync ID that will be used for creating Baffle Shield.
2) Create IBM Cloud Baffle Shield Service.
Populate the deployment values. Check on the vendor agreement checkbox , click Install.
| iaas_classic_api_key | Use IBM API Key |
| iaas_classic_username | User your IBM Cloud login email |
| ibmcloud_api_key | Use IBM API Key |
| image_location | IBM CR location where Baffle images are present |
| cluster_name | Kubernetes Cluster Name |
| BM_LB_URL | baffle manager load balancer url. |
| shield_sync_id | Shield sync id from the Baffle Manager |
| baffle_version | Specify Baffle Release Version |
Once deployed, you’ll see the Baffle Shield Pod up and running.
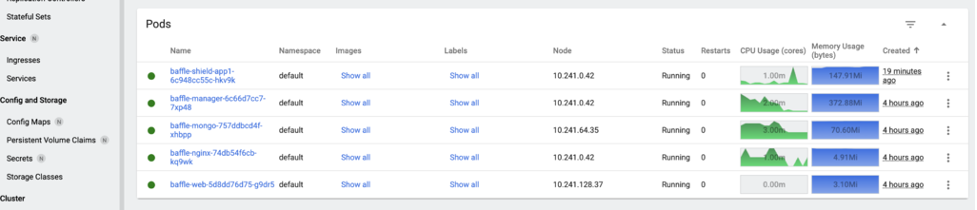
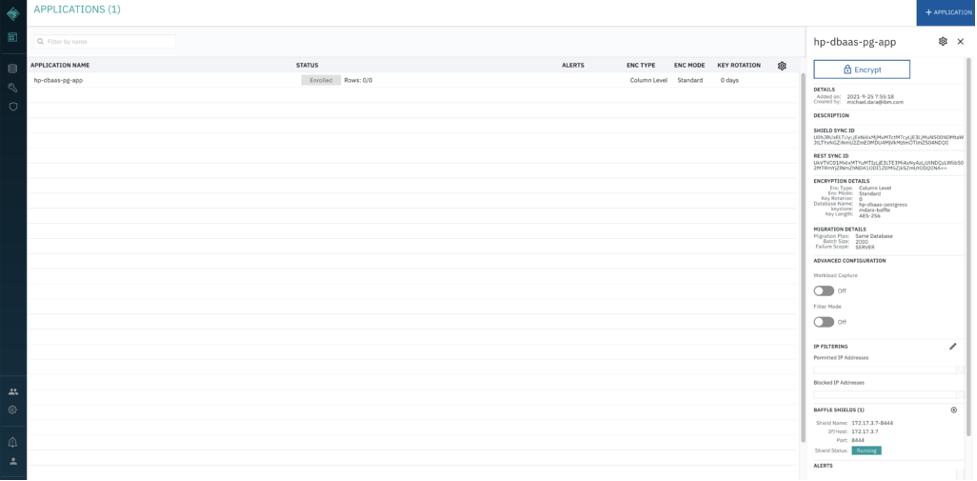
Now go back to Baffle Manager console, Click on the enrolled application. You’ll see the Baffle Shield Registered with the Baffle Manager.
Upload the Keys to the Baffle Shield
- Download the Baffle Shield public and private keys from the below URL’s
https://public-baffle.s3.us-west-2.amazonaws.com/releases/jks/baffleshield-ibm-hp-dbaas-pg-ca.pem
- Upload baffleshield-keystore.jks to the Baffle Shield deployed on Kubernetes Cluster.
 ibmcloud ks cluster config --cluster mdara-hp-dbaas-postgres-cluster

 kubectl cp baffleshield-keystore.jks baffle-shield-app1-6c948cc55c-hkv9k:/opt/sslconfig/baffleshield-keystore.jks
- Restart the Baffle Shield Pod
kubectl rollout restart -n default deployment baffle-shield-app1
Testing the Encryption/Decryption with Baffle Shield
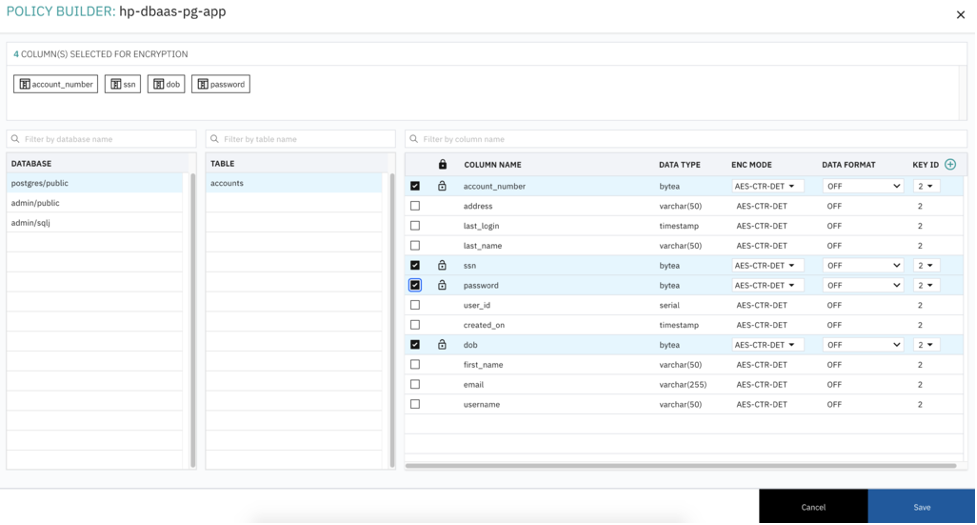
Click on Migration Details -> Encrypt and select the columns you want to encrypt, then click save.
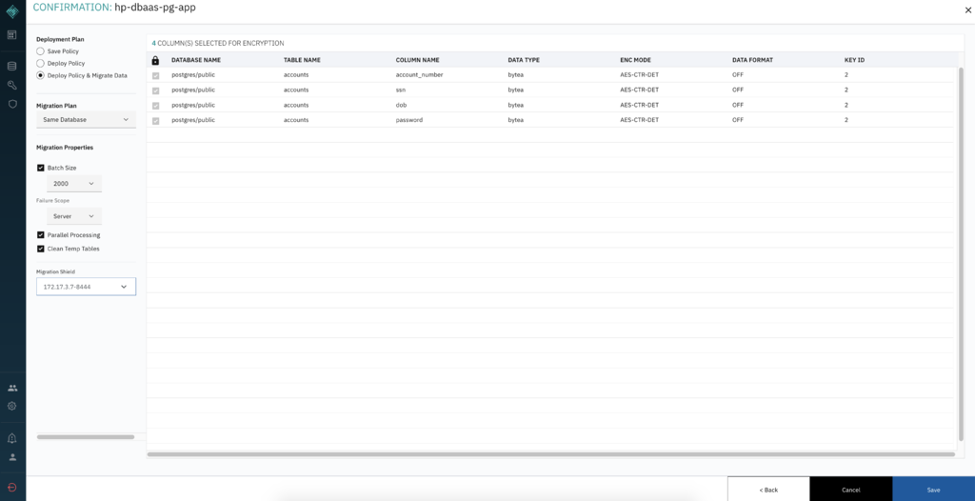
Select Deploy and Migrate radio button, then click save. This will migrate all the existing data in the HP DBaaS for PostgreSQL and apply the encryption rules for the selected field.
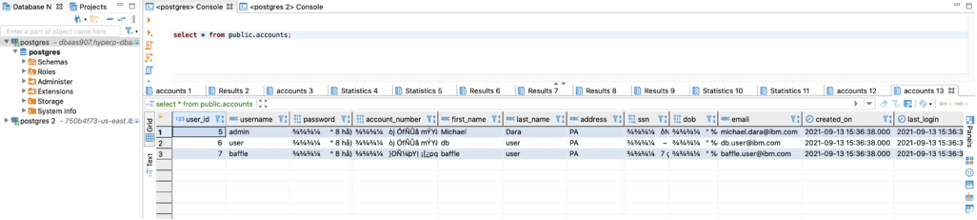
To verify migrated data, go to DBeaver, query the data. You’ll see the selected fields are encrypted and not in plain text.
Applying the Migration Policy for new records to be inserted into Database
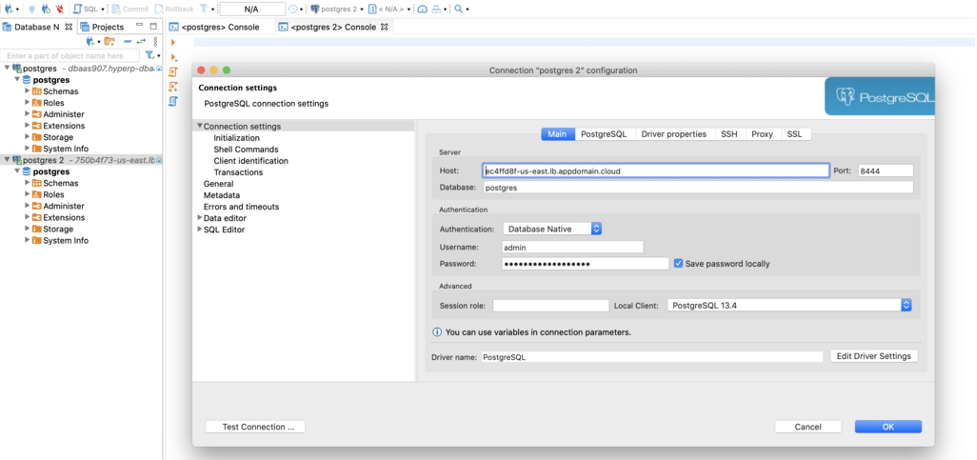
To apply the migration policy for new records on the fly and encrypt before writing to the database, Point the application or DBeaver database to the Baffle Shield Load balancer URL and issue Database insert commands.
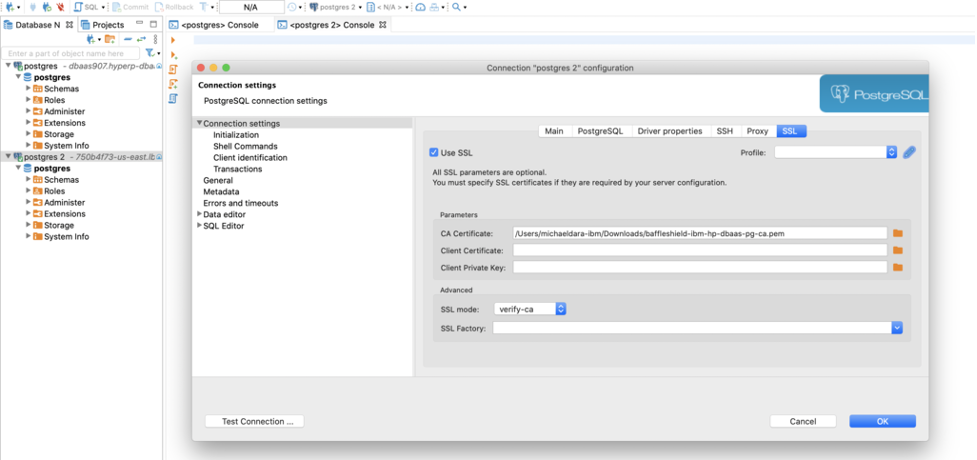
Click on SSL tab and select the downloaded Baffle Shield private key file baffleshield-ibm-hp-dbaas-pg-ca.pem
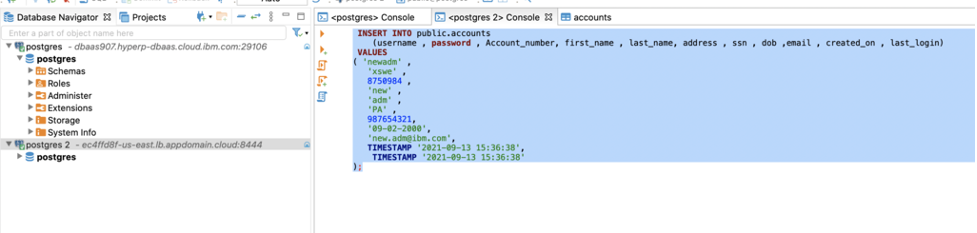
Insert a new command through the Baffle Shield Load Balancer
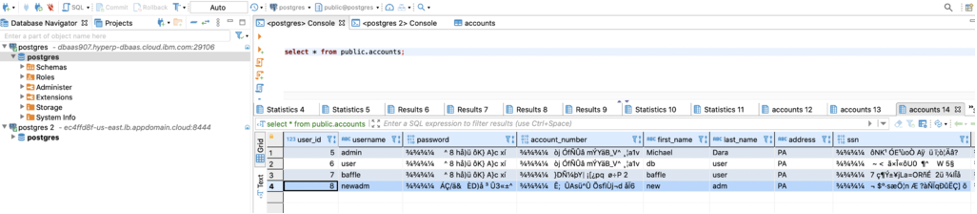
Now Query on the HP DBaaS for PostgreSQL and you’ll see the newly inserted record as encrypted.
Decrypting the Database Records
Querying the data through the Baffle Shield Load Balancer will return the data decrypted.
Migrating All the Database Records for decryption.
The encrypted database records can be migrated back to their original state through decryption.
From the Baffle Manager Console, Select the Enrolled Application -> Migration Details -> Decryption
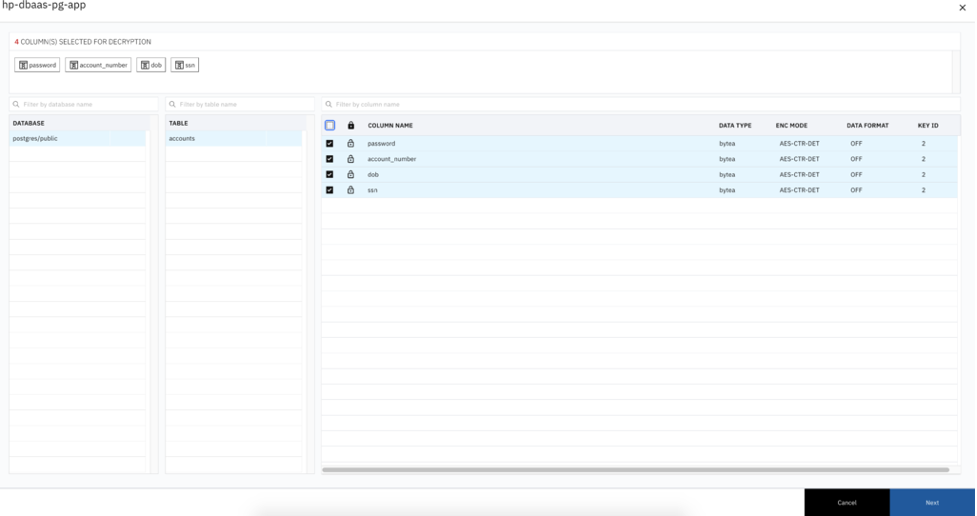
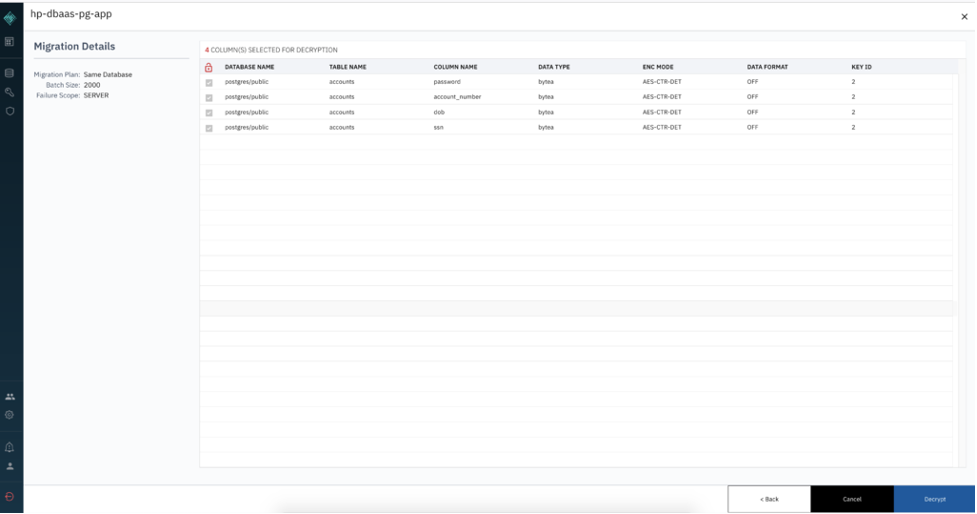
Click Next and click on the Decrypt button
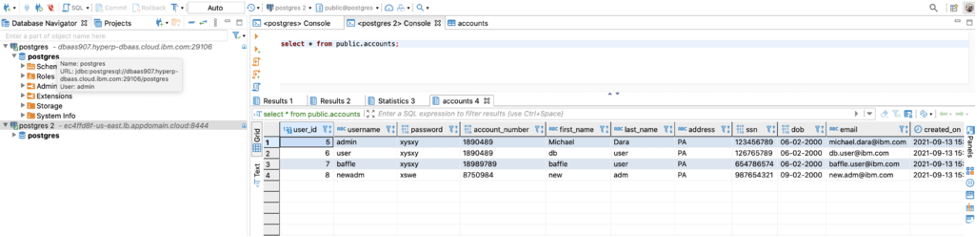
To verify the results, go to DBeaver, run a query against the HP DBaaS for PostgreSQL, you’ll see all the records in decrypted state.
Find more helpful walkthroughs and demos on how to initialize and configure Baffle’s Data Protection Services by visiting our Resources page.


Join our newsletter
Schedule a Demo with the Baffle team
Meet with Baffle team to ask questions and find out how Baffle can protect your sensitive data.

Easy
No application code modification required

Fast
Deploy in hours not weeks

Comprehensive
One solution for masking, tokenization, and encryption

Secure
AES cryptographic protection

Flexible
No impact to user experience